Cloudflare Workers Backend
Click
Workers & Pages->Overview->Create Application
Select
Worker, clickCreate Worker, change the name, and then clickDeploy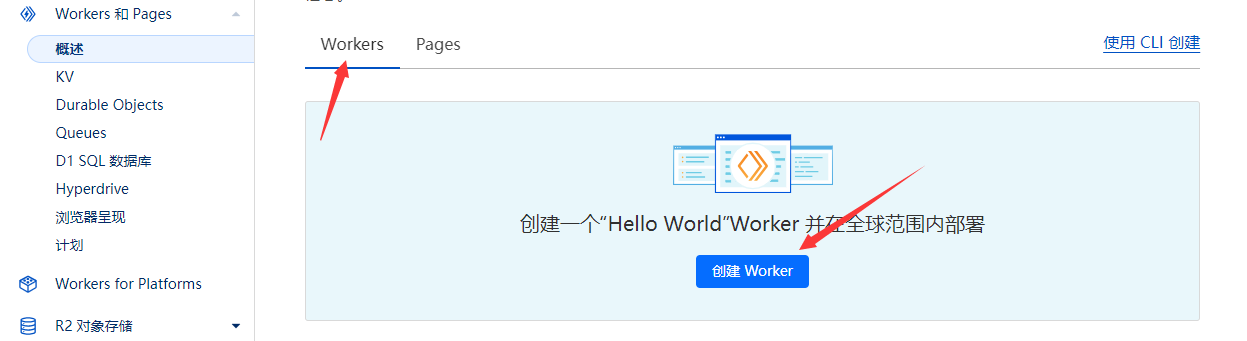
Download worker.js
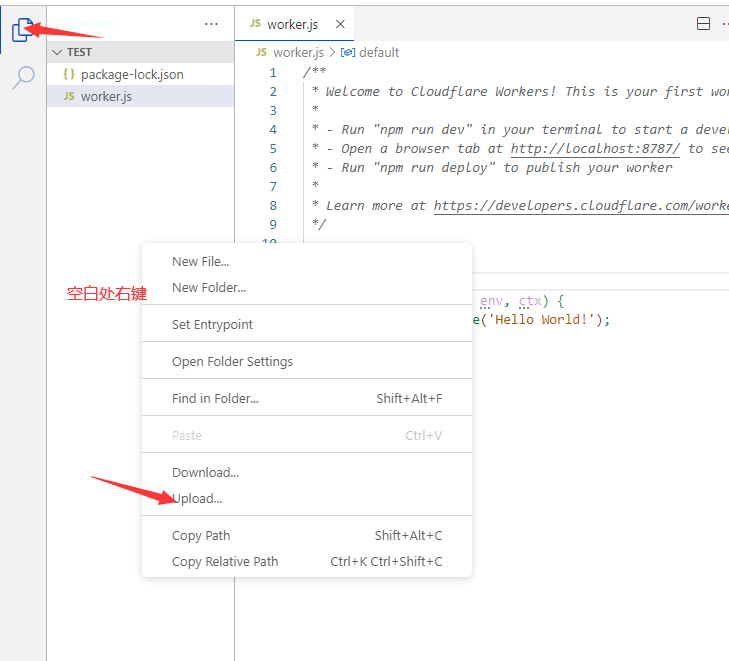
After the
Deployis successful, the following interface will appear. ClickEdit Code, delete the original file, uploadworker.js, and clickDeploy.Note
You need to click the Explorer in the left menu first.
In the file list window, right-click and findUploadin the context menu.
Please refer to the screenshot below.
Click
Settings->Domains & Routes. Here you can add your own domain, or you can use the automatically generated*.workers.devdomain. Remember this domain, as you will need it when deploying the frontend.Note
Open theworker'surl/test. If it displays{"code":200,"message":"Test route is working!"}, it means the deployment is successful.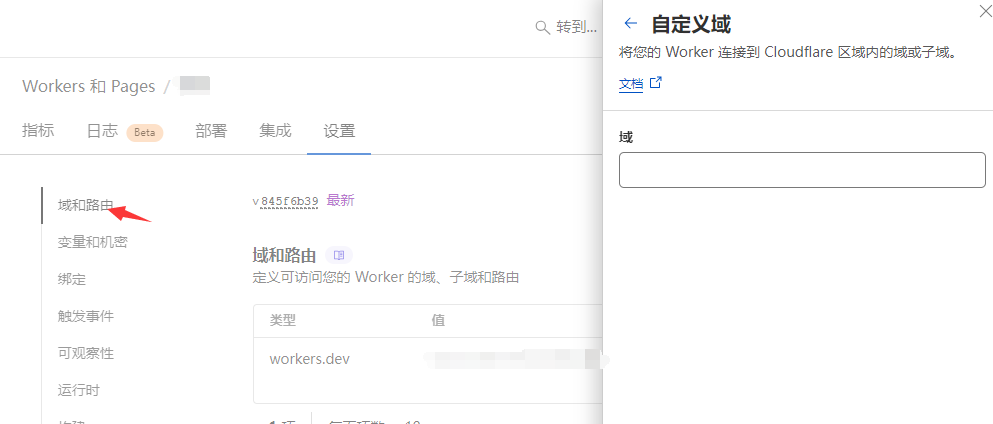
Click
Settings->Variables and Secrets, and add variables as shown in the image.Note
If you have amoderatecontentreviewapikey, you can add variables to enable the review feature.
Add the variable nameModerateContentApiKeywith the value being thekeyortokenfrommoderatecontent.
It seems the login entrance on themoderatecontentofficial website is currently unavailable.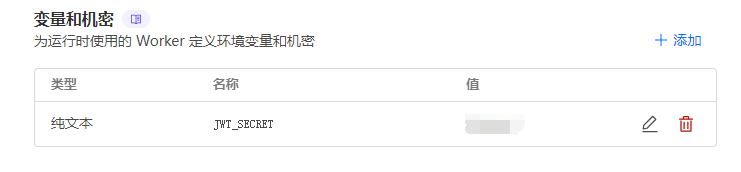
【v0.0.5】New variable:
INCLUDE_PRIVATE_IN_RANDOMvalue istrue, the random image includes private images; value isfalse, it is a public image, i.e. an image uploaded by a non-logged-in userClick
Settings->Bindings, clickAdd, name it as shown in the image, select theD1database you just created, and clickDeploy.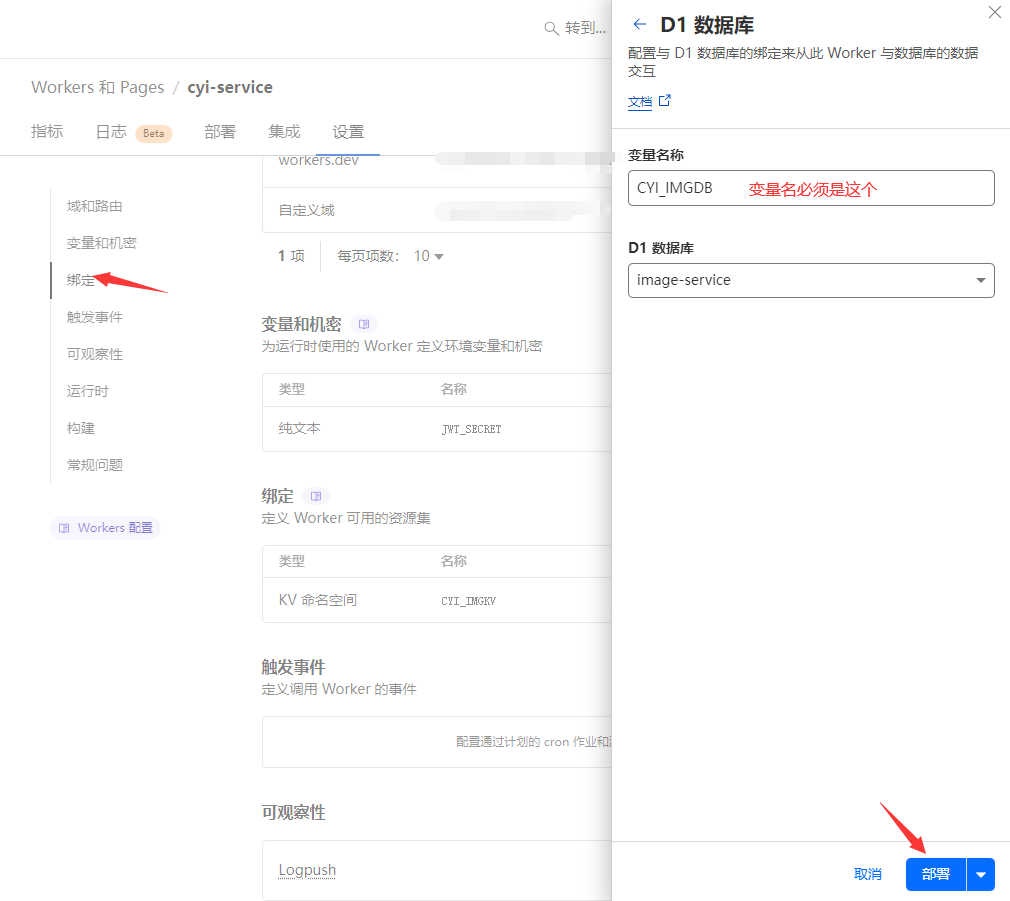
Click
Settings->Bindings, clickAdd, name it as shown in the image, select theKVnamespace you just created, and clickDeploy.